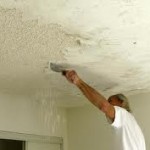
How to Remove a Popcorn Ceiling
Popcorn Ceiling Removal Made Easy
Like a lot of decorating styles, the textured popcorn ceiling was popular years ago but they are no longer in vogue. Oftentimes, during the course of a home inspection, we are asked if these popcorn ceilings can be removed.
As professional home inspectors, we are more than happy to guide our customers with hints and tidbits of information to make the home owning experience more enjoyable.
With that in mind, I thought it would be a good idea to share the few simple steps it takes to removing a textured popcorn ceiling.
Tools Needed:
- A 6-inch putty or taping knife or 12-inch drywall taping knife. I prefer the 6-inch knife; there is less drag and resistance when scraping the textured popcorn ceiling material.
- Dust mask and safety glasses.
- A ladder.
- Lots of plastic sheeting.
- A spray bottle similar to those that hold cleaners or a larger, hand pumped garden sprayer.
Special Note:
Before you begin, it’s important to know if the home was built prior to 1978 or more importantly if the popcorn ceiling was sprayed prior to 1978 or shortly thereafter.
The popcorn ceilings at that time may contain asbestos fibers, which is a known health hazard and carcinogen. If you suspect that it was applied prior to 1978 or you just aren’t sure, have a sample taken and analyzed by an environmental testing lab before you begin. If the material contains asbestos fibers, it is recommended you leave the job to a professional asbestos abatement company.
Step 1: Prep Work:
- Remove all furniture and personal belongings from the room
- Cover walls and floor with plastic and tape to protect those surfaces
Step 2: Wet the Surface:
Using the garden sprayer (NOT a hose) or spray bottle wet the surface of the popcorn ceiling. I use several passes of lightly spritzing or wetting the surface. You don’t want to over-saturate the surface so that it damages the substrate or wallboard underneath.
Allow 15-20 minutes to soak. The surface will turn a light, dull gray color
Step 3: Scrape:
After sufficient time has passed, start scraping. Be careful not to gouge the substrate material.
If you find the going tough, spray a little more water and wait a little longer, the material should scrape off fairly easily.
NOTE: If the popcorn ceiling had been previously painted, the job just got a lot tougher. You need to penetrate the paint coat so the texture material will absorb the water. One trick is to knock down the texture with the edge of a saw blade or scraper and then wet the surface.
When all the textured surface material has been removed, you are done. But, don’t be surprised if you will need to skim coat the surface with drywall compound to achieve that perfectly flat surface.
Turn on a few fans and allow the room and surfaces to dry completely before skim coating or finishing with paint. I would roll up the plastic after all finish work has been completed.


