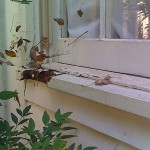
As a professional home inspector and owner of a leading home inspection company in Buffalo, NY and the surrounding Western New York (WNY) area, I have seen my share of rotted wood trim and siding material. After all, the weather in Erie, Niagara and surrounding counties can be quite severe thereby subjecting the exterior of our homes to a beating on a regular basis.
Over the past 20+ years of performing thousands of home inspections, I have found one of the most common areas to experience wood rot is the trim and sills around windows.
Believe it or not, repairing these areas might be easier than you thought. There are some great wood epoxies on the market today that will make repairing these rotted areas a snap. This becomes particularly important when dealing with irreplaceable, 100 year old, ornate moldings and trim found on the Victorian houses so common in Buffalo and Western New York.
Before You Begin
Research and buy the best wood epoxy and repair material available. It is a two step process and it is not the common wood filler often found at major home improvement centers.
And always remember, surface preparation is the absolute key to the success of your repair. If you do not prepare the surface properly and follow all instructions by the manufacturer, your repair will likely fail.
Step 1
Start preparing the surface to be repaired by removing as much of the old paint as possible with a scraper. I have found the 5 in 1 scraper/tool is one of the best tools for these purposes.
The reason for the paint removal is two fold, first to expose any damaged and rotted wood; second, to remove loose scaly material that will hinder bonding.
Step 2
Remove all the rotted wood. Using a wood chisel, remove as much of the affected and damaged material as possible. When you apply the repair material you want it to bond to a sound material, not damaged wood.
Step 3
Ensure the area to be repaired is completely free of damaged wood and debris. If the area is large or extensive, you should consider drilling a series of 3/8-inch holes into the sound material at the repair site to help achieve a longer lasting repair and improve bonding.
Following the manufacturer’s instructions, apply part 1 of the repair material – a deep penetrating consolidant to restore structural integrity to the wood fibers. Allow it to dry.
Next, apply the repair material, in roughly the shape and form of what you want it to look like when all is done. Apply more than necessary, so you may file, sand and shape the material to match the surrounding molding once it has cured/dried.
Step 4
Allow the repair material to fully cure, per the manufacturer’s instructions, usually overnight. Using a coarse file or rasp, start to shape the material to match the existing, bordering material. Then sand with a finer grit sandpaper and sanding block (where appropriate) to shape and finish.
Step 5
When you have completed the sanding and shaping process, prime, caulk and finish paint to protect against further material degrading.
_________________________________________________________________
Lawrence Watkins is a NYS Licensed Home Inspector and the President of Specsure Property Inspections. As a leading full service residential home inspection and commercial property inspection company proudly serving Buffalo, Lewiston, Orchard Park and all of Western New York (WNY) for over 20 years, we are pleased to provide timely and simple DIY tips and hints for today’s homeowner.
For more information you can reach us at 716-881-1914 or via email at info@specsure.com.


