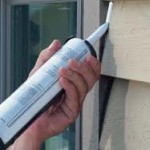
The summer is the perfect season to work on outside projects around the house. As a home inspector with a leading home inspection company in Buffalo and all of Western New York (WNY), I see a lot of deferred maintenance on many of the houses we inspect for home buyers and home sellers alike.
One area that is often overlooked or neglected is caulk application around trim and siding joints, windows, doors etc. Applying a good quality caulk is critical to keeping the elements of weather from infiltrating the interior of our homes. It also goes a long way in reducing heat loss and gain.Replacing the caulk around the exterior of your home is a fairly easy job and you should be able to tackle it in a weekend. Here’s how to get started:
- Check the caulk at siding and trim joints around the exterior of the home. Pay particular attention to the areas where there is a change in materials or the overall plane of the wall. Look for loose, missing or brittle caulk material.
- Also if there is any damaged trim or siding, i.e. degraded or rotten wood, it should be repaired first.
- Remove loose or brittle caulk material using a 5-in1 painter’s tool or chisel. Be careful not to gouge or damage the surrounding siding and trim material.
- Once the old caulk is removed, clean the area of debris, dust and particles with an old paintbrush.
Now you’re ready to apply new caulk:
- Load a tube of caulk into a caulk gun. Using a utility knife, remove a portion of the plastic tip. The deeper you go down the tip to remove the end, the more caulk will be released. Be careful not to remove more of the tip than necessary.
- Using a long nail or piercing shaft on the caulk gun, insert it in the end of the tube of caulk to pierce the tube and allow the caulk to flow.
- Practice applying the caulk to some scrap materials so you get the feel of the caulk gun and flow of caulk.
- As you start using the caulk gun, you will find the caulk will continue to flow even if you do not keep pressure on the trigger. To stop the flow, release the plunger at the end of the tube.
- Apply the caulk to cleaned joints in a slow, steady movement. Dragging the tip along the joint to lay down a bead of caulk that completely covers the joint and adheres to both sides of the opening/joint.
- If a joint or opening is more than ½ inch deep or wide, don’t try to fill it with caulk. The larger voids should first be filled with expanding type foam, remove the excess and then caulk.
Carry both a damp and dry rag with you. No matter how careful you are, it can be a messy job and you want to be prepared when too much caulk comes oozing out of the end of the gun.
___________________________________________________________________
Lawrence Watkins is a NYS Licensed Home Inspector and the President of Specsure Property Inspections. As a leading full service residential home inspection and commercial property inspection company proudly serving Buffalo, Lewiston, Orchard Park and all of Western New York (WNY) for over 20 years, we are pleased to provide timely and simple DIY tips and hints for today’s homeowner.
For more information you can reach us at 716-881-1914 or via email at info@specsure.com


